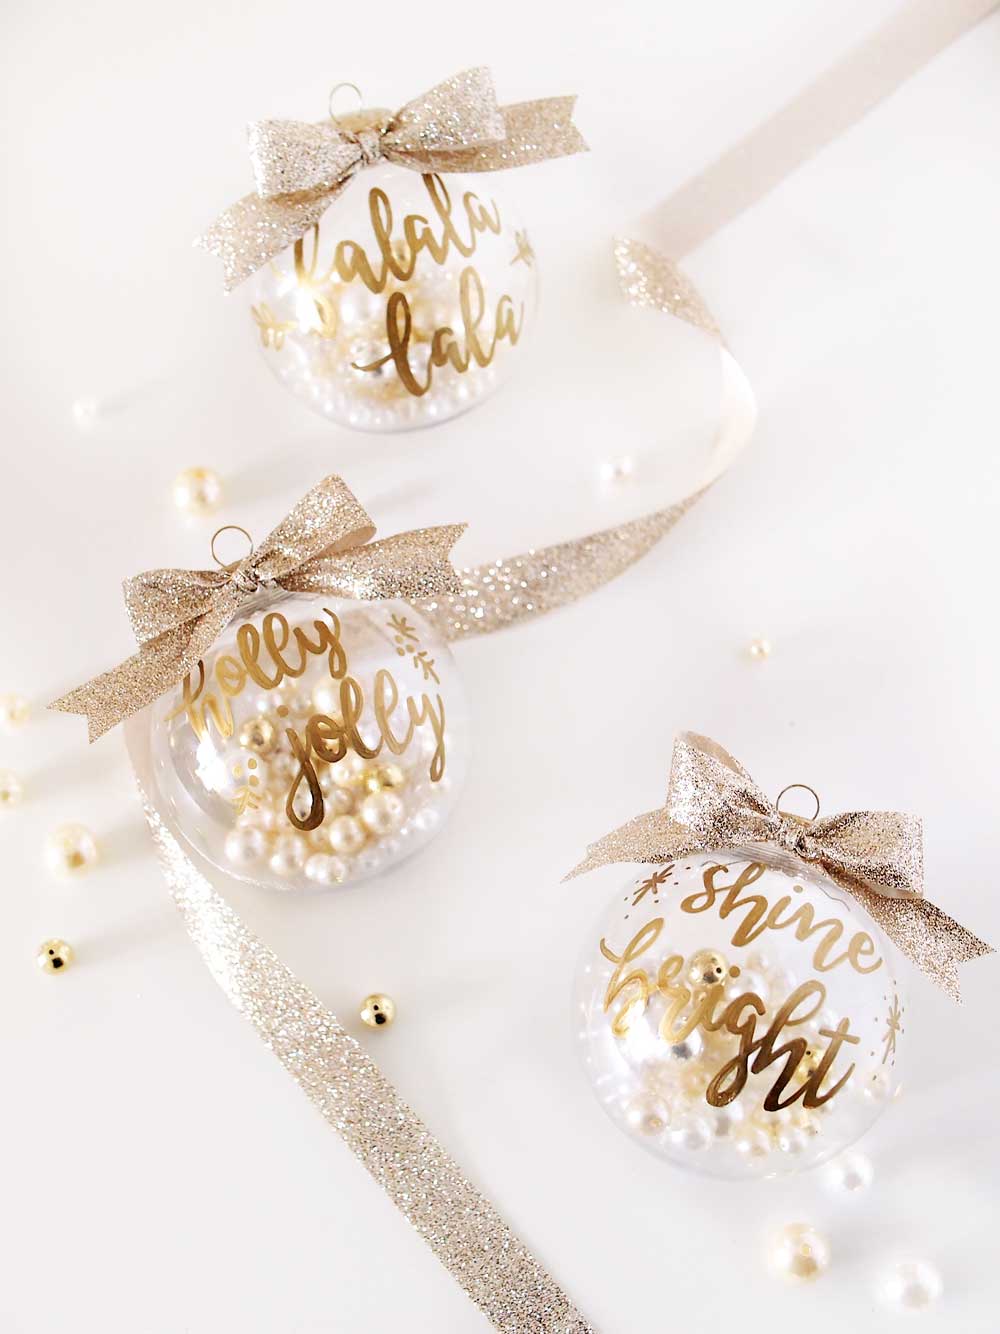
{DIY} Gold Hand Lettering Christmas Ornaments
December 10, 2017
Wow. It's already December!
Have you made a shopping list and checked it twice yet? My friends and I have stopped gift exchange for so many years now and I actually don't miss it quite frankly. Because it's actually pretty good for my wallet. Ha-ha. But, I still enjoy the idea of gifting as a "just because" gesture and surprise my friends with some homemade gifts.
Today, I'm sharing this simple DIY idea on how to make your own Christmas ornament. You could hang on your tree or personalize it as a gift for your special someone! Let's get started.

{How to Make Gold Hand Lettering Christmas Ornaments}
You'll need:
- Oil Based Sharpie in Gold
- Plastic or Glass Ornament Globes
- Gold Spray Paint
- Ribbon
- Pearls
- My Template
If you're making these as gifts for someone, then you could buy the glass globes from Michael's. They are nicer but only come in small sizes around 2.6 inches. Otherwise, plastic globes from Dollar Tree are larger and could last you for decades. Nobody would even notice the difference once they are hung on the tree!
First, you'll need to spray paint the lid and hanger with Gold spray paint. I used Rust-oleum Metallic. And I wouldn't substitute it with any other brand because this has the best gold effect than all of the ones out there. You could check out the colour from the vases I used for my wedding centerpieces. Spray paint the lids from outside and inside. You might need two coats depending on how thorough you spray them. Let them dry for 10 minutes before spraying the other side.

While you're waiting for the paint to try, you could start hand lettering onto the globes. Hand lettering is all in favour these days. But good hand lettering comes with practice and skills. And it takes a lot of time and patience. Without someone teaching you the proper way to hand letter, it can be difficult to master. But, today, you're in luck! I've prepared a template for you so that you could "cheat" the hand lettering technique for these globes and make them look like you're a calligraphy pro! Go download my awesome template here.

Cut out each square and insert each of them into a globe. Push it against the side. Now, you have a reference to trace the words against. The template is meant to guide you so that you have an approximate idea of each character style and the spacing between them. Trace each letter carefully with a sharpie. I used an oil-based sharpie marker for my hand lettering. Oil-based is more durable and takes longer time to dry than water-based. The texture is a bit more like metallic latex paint. Once you've traced the outline, remove the square piece and colour in the strokes so that they mimic how a hand lettering would look like, ie, make certain strokes thicker than others. If you make a boo-boo, just wipe it off with a Q-tip dipped in nail polish remover and do it again.


There you have it! Hand lettering has gotten a lot easier now, hasn't it?
Now, you're ready to insert your pearls into the globes! I got this pack of mixed pearls at Michael's during their 50% sale. I love the fact that they have a mixture of various sizes and shades of gold and champagne.


To make a perfect ribbon at the top of your globe, follow these instructions here. I used this glittered ribbon to add more dazzle and sparkles to my ornaments. I also cut a hoop with the ribbon and add it to the original hoop (not shown in picture) to make the hanging easier. And, that's it!


I hope you give this a try this Christmas!
Happy decorating!


To make a perfect ribbon at the top of your globe, follow these instructions here. I used this glittered ribbon to add more dazzle and sparkles to my ornaments. I also cut a hoop with the ribbon and add it to the original hoop (not shown in picture) to make the hanging easier. And, that's it!


I hope you give this a try this Christmas!
Happy decorating!
Pin this for later!


Check out my other Christmas DIY ideas!
Make Your Own Christmas Cutout Card (Free Download)
Rudolph the Reindeer Christmas Cake Pops (Tutorial)
Sweetest Present to Give: Christmas Cupcakes Bouquet (Tutorial)
Rudolph the Reindeer Christmas Cake Pops (Tutorial)
Sweetest Present to Give: Christmas Cupcakes Bouquet (Tutorial)

![About [span]me[/span]](https://blogger.googleusercontent.com/img/b/R29vZ2xl/AVvXsEg51YZA3uff_lGfAm2WPvaPtznUF0gsieSuVaBa_d4ueEQHmGAHJoO-6IjG2QhrHsB6TFxtBe7Kp7pgPhQ9JxDPFeWf9zlhWBpmioDCq_cgwCmfvXsb3Q935VBe0Bg1yrOJFakkvZK6XQ/s1600/profile7.png)


![About [span]me[/span]](https://blogger.googleusercontent.com/img/b/R29vZ2xl/AVvXsEi0M_3kH8dItlAXTuIsv2fy6Vh66DmueOkq-Xb31dyGKOzuemaVtbrM_2rVWoIm3NFdwlpPEnezCBHeO6vHRn-aPne1M7U9EI4PUTUT6f0IyYR43irzt8-u23HGLtfqpBdheA-g6LhyQA/s608-Ic42/profile5.png)

0 comments
I'd love to hear your thoughts and comments! Come back soon :)