DIY Rainbow Wall Hanging Tutorial (with matching charm)
August 10, 2020
Now that baby Justice has arrived, I've been trying to squeeze in some crafting times in between nursing and his nap times. I still have a lot of DIY projects to finish for baby J. If you've seen my nursery room reveal, you'd know that I still have a blank wall to fill up. My latest project for his nursery is this custom rainbow wall hanging using colours that match the rest of the room. I wanted the nursery to be bright and cheerful. And this cute rainbow wall hanging does just that. I love how it turned out so much that I even made a mini version to hang on our car rearview mirrors. I might even make another one as a keychain too...Can you tell that I'm obsessed? LOL. That's because they are so easy to make!
The best part of DIY-ing this yourself is that you can control the size, colours and add additional charms to it to make it personal. Here's what you need:

How to Make Your Own Rainbow Wall Hanging Tutorial
Supplies:
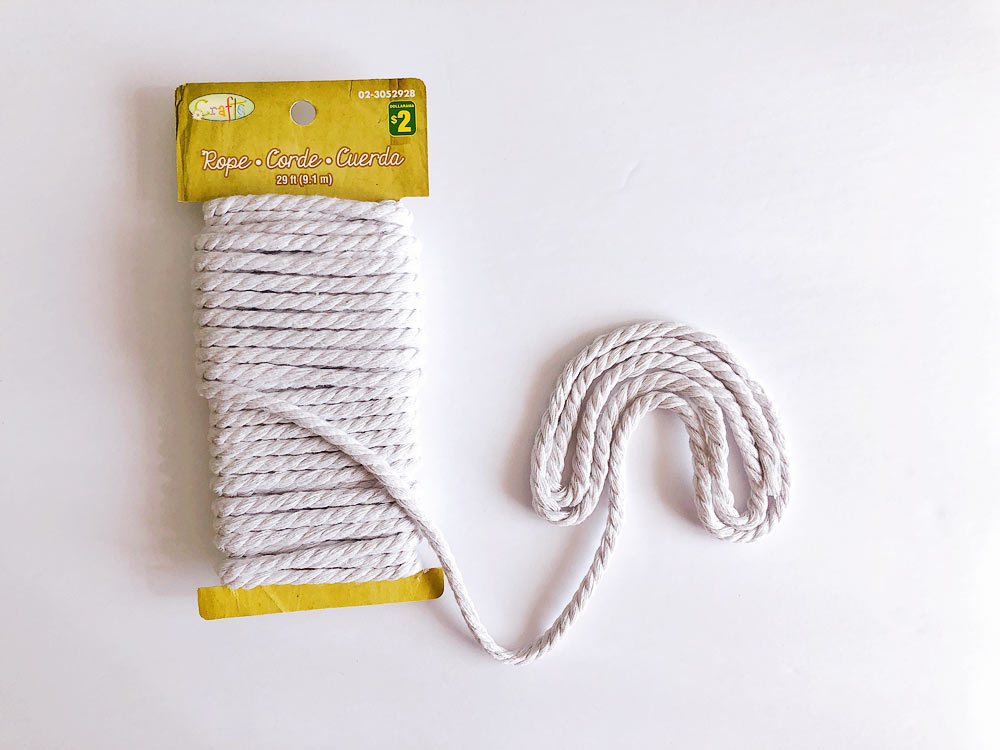
- Cotton Rope (I bought mine for the dollar store)
- 5 colours of yarn of your choice
- Scissors
- Craft/Beading Wire
- Glue gun
- Painter's tape
- Thin cotton rope (optional)
- Wooden beads (optional)
- Thread and needle (optional)
First, lay the rope to form a rainbow arc shape. I wanted my rainbow to have 5 arcs. You can make as much or as few arcs as you like.
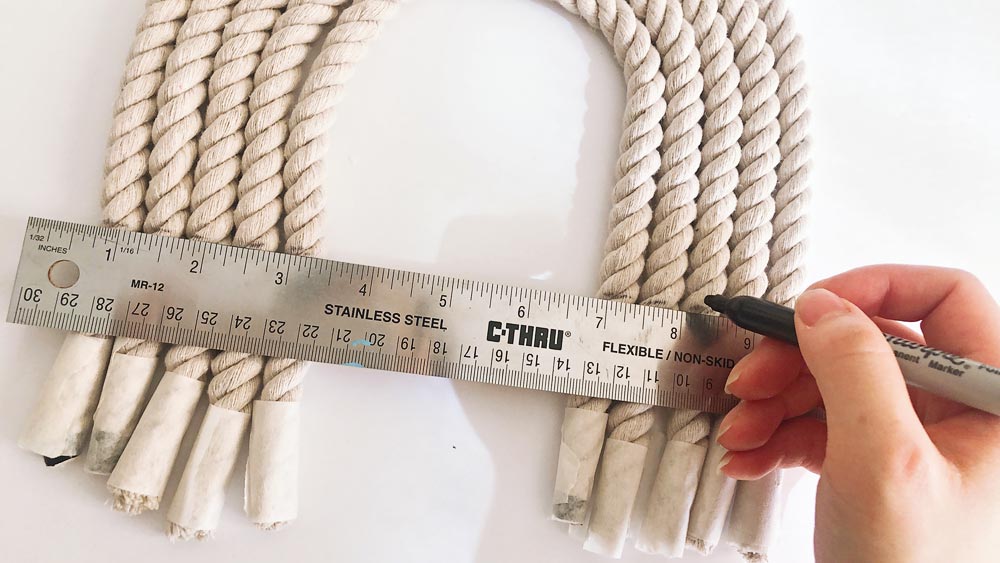
Once you've decided the number of arcs, cut the rope on the lopes and tape all the open ends with painter's tape to prevent from fraying.

With a marker, draw a line where you want the arcs to begin.

Trim the wire to match the length of your markers. I inserted my wire inside the rope so it stays put for next step.

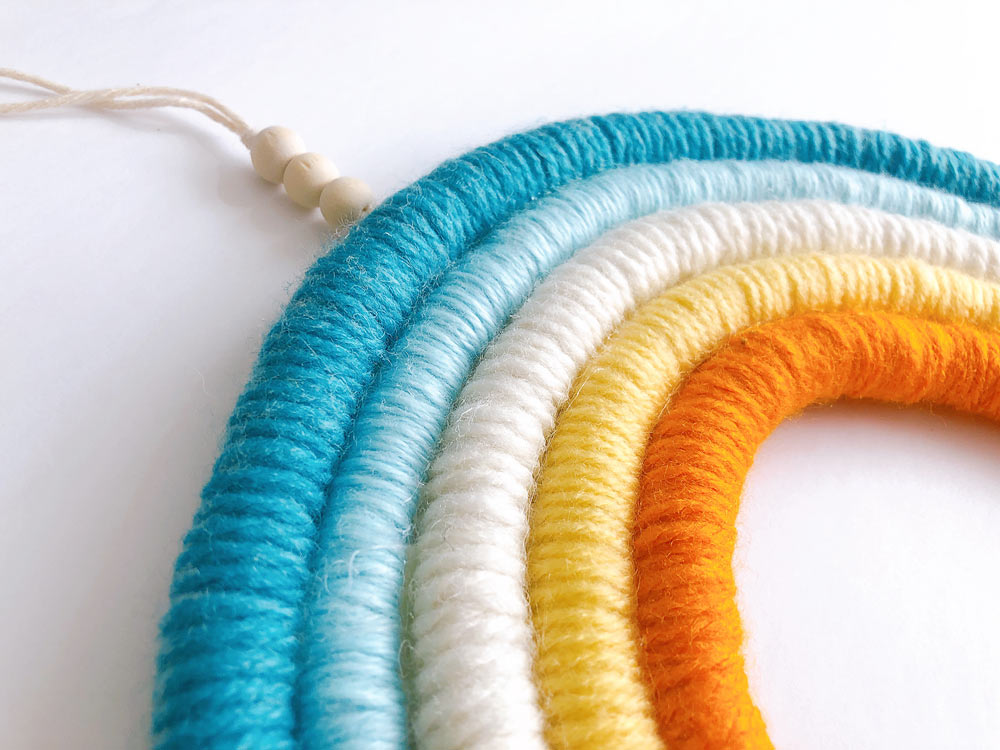
Take a piece of yarn and tie a knot at your marker. This will be the start of the arc. Wrap around the rope until you reach the other side of the marker. Make sure the yarn does not overlap with one another. You’d want the yarn to be parallel with each other for a neater look. Tie a knot on the side so you can hide it with another arc. Repeat this step for the rest of the colours.
Pro tip: I find it easier and faster to wrap the yarn by turning the rope instead of the yarn. Wrap from left to right (unless you’re a lefty then wrap from right to left).
Using a hot glue gun, glue the side of the arc, starting from the inner arc to each of the arcs.

Remove the painter's tape and unravel the ends. Trim the ends to the desired length with big utility scissors so they are even.
Pro tip: use a hair straightener to straighten the ends.

To make the rainbow hanging, I use a thin cotton rope and added some wooden beads. Loop the cotton rope and tie with a knot. I left the rope long so I could adjust the length later. Using similar colour thread, stitch the rope to the back of the rainbow above the knot. This way, the length of the rope is adjustable.


How to Make a Rainbow Mini Charm
For hanging on your car rearview mirror or as a keychain!

Supplies:
- Cotton Rope (Dollar store is your best friend)
- Embroidery threads that are similar in colours
- Scissors
- Craft/Beading Wire
- Glue gun
- Painter's tape
- Thin cotton rope (optional)
- Wooden beads (optional)
- Thread and needle (optional)

For the matching mini charm, it's a similar process except just smaller in scale so it's a lot quicker to do. Instead of yarn, wrap around each arc with embroidery threads the same way, covering the wire.


Once finished, glue the arcs together with a hot glue gun. Unravel the ends of the rope and trim them straight. Stitch a thin cotton rope or embroidery thread to the back. I added wooden beads. You can add diffuser oil to these beads and let them absorb the scent. Now you have a matching diffuser charm to hang in your car!


Pin this for later~


Check out my other nursery decor DIY tutorials


![About [span]me[/span]](https://blogger.googleusercontent.com/img/b/R29vZ2xl/AVvXsEg51YZA3uff_lGfAm2WPvaPtznUF0gsieSuVaBa_d4ueEQHmGAHJoO-6IjG2QhrHsB6TFxtBe7Kp7pgPhQ9JxDPFeWf9zlhWBpmioDCq_cgwCmfvXsb3Q935VBe0Bg1yrOJFakkvZK6XQ/s1600/profile7.png)


![About [span]me[/span]](https://blogger.googleusercontent.com/img/b/R29vZ2xl/AVvXsEi0M_3kH8dItlAXTuIsv2fy6Vh66DmueOkq-Xb31dyGKOzuemaVtbrM_2rVWoIm3NFdwlpPEnezCBHeO6vHRn-aPne1M7U9EI4PUTUT6f0IyYR43irzt8-u23HGLtfqpBdheA-g6LhyQA/s608-Ic42/profile5.png)

11 comments
This is cool and unique DIY wall project. I will try to copy your instructions and make one for my daughter.
ReplyDeleteThis is the cutest DIY decor piece ever. I am going to make this with my step-daughter. She loves rainbows. Thank you for sharing!
ReplyDeleteThis is so lovely what a cute decoration
ReplyDeleteWOW! love the color combination. I will surely make these for display esp now we're still on covid lockdown here, any DIY is appreciated. Thanks for sharing
ReplyDeleteThis is super adorable! Thanks for sharing the tutorial.
ReplyDeleteSo cute! You made it looks so neat. Will deffo try this, glad to know that I can use my embroidery thread as well, less materials to buy now...
ReplyDeleteThat's a great DIY project, easy and beautiful. I would love to try that.
ReplyDeleteThis is super cute, and a project my niece would love! I’ll have to try and make this with her the next time we get together!
ReplyDeleteRayka | South Asian Skin Blog
www.southasianskin.com
Thanks so much for this. I have been looking at making some for my kids rooms.
ReplyDeleteThis looks so beautiful! I love diy because it stimulates creativity.
ReplyDeleteI like how your mind does this creative stuff. I like how you incorporate this colorful ropes into a rainbow hanging in the wall.
ReplyDeleteI'd love to hear your thoughts and comments! Come back soon :)